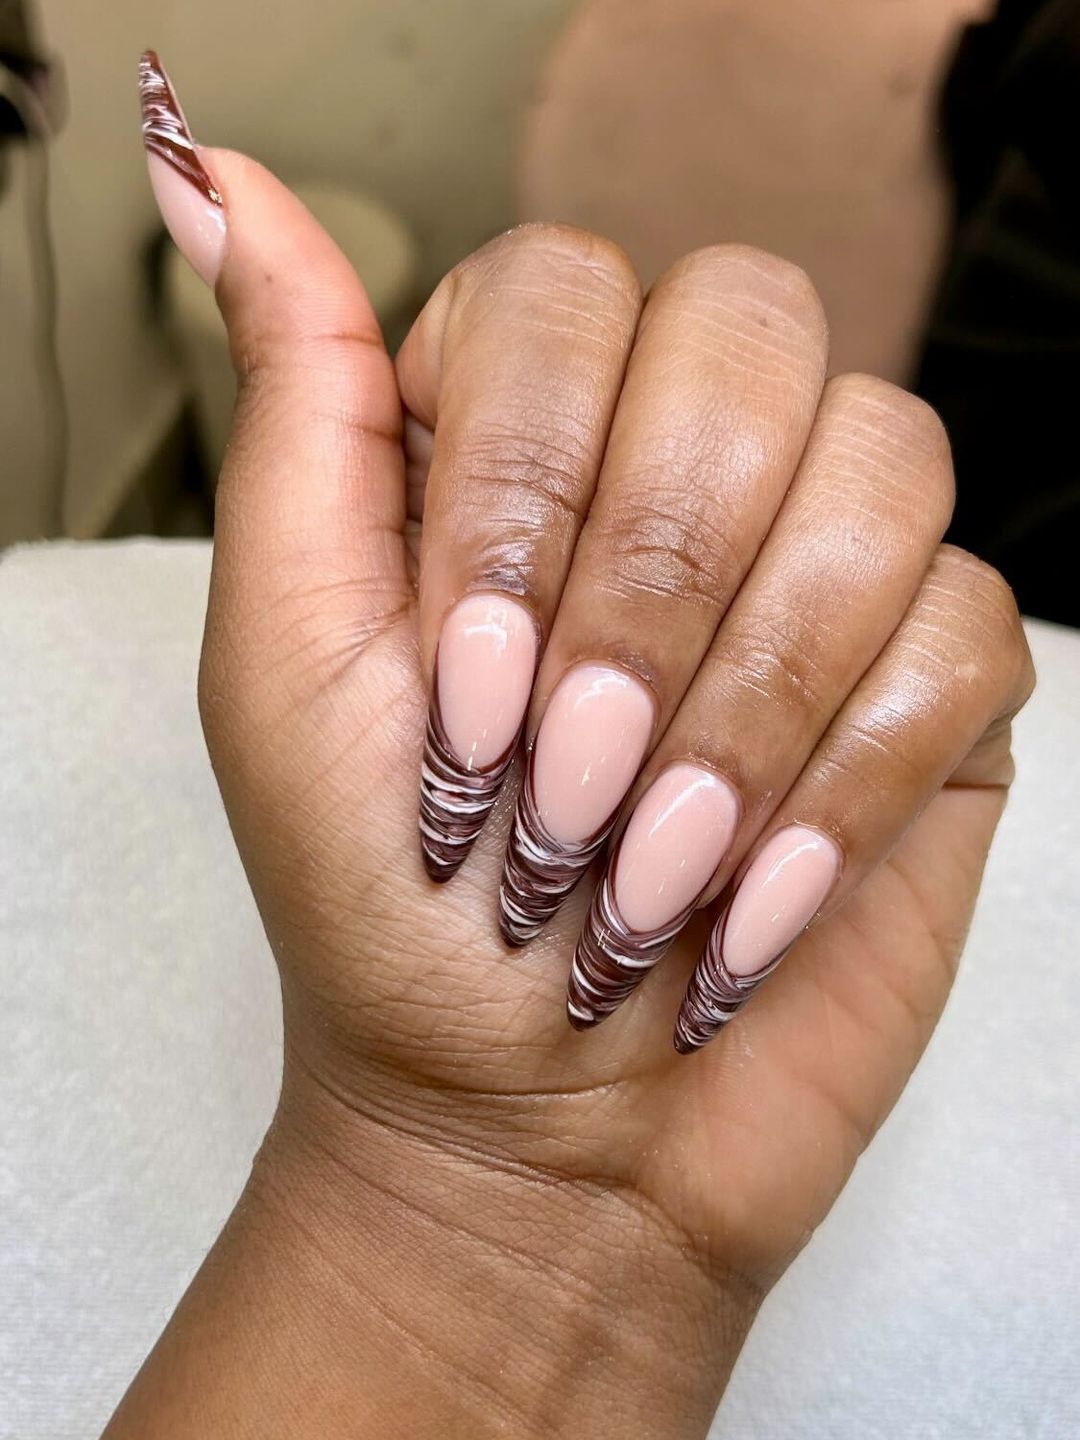
I'm obsessed with the nail salon - so If you've clicked on this story, I'm hoping you can also relate to my deeply expensive problem. If my nails aren't done, then there is really something wrong.
I take a very meticulous approach to my nail appointments - conducting picture research weeks before so by the time I walk through the doors for my appointment, my intricate nail designs ready to go.
As a manicure addict, I find joy in discovering new shades and designs as the seasons change. Now that we're entering winter, naturally the hues and colours I have chosen for my manis are deeper and darker. Bring on the cherry reds, plum purples and navy blues. However, this year I'm leaning towards brown hues - but with a tasty twist. Enter: 'Chocolate Swirl' nails.
Thanks to Hailey Bieber's viral 'cinnamon-roll' cat-eye nails, I have yummy dessert-inspired nail art on the brain. I based this this set on a chocolate swirl tiramisu. I decided to use my love for deep chocolate hues but also put a spin on the classic french tip, by incorporating the 70s-inspired white swirls on them. This decision really elevated the design.
Why have chocolate and cinnamon brown nails become so popular?
Sophie Vongkhamsao, in-house beauty and content specialist at Fresha, shares her expertise with H! Fashion on the rise of chocolate brown and cinnamon brown nail designs. She says, “This winter season, chocolate brown and cinnamon brown nails are the standout choices for manicures. These shades are rich, luxurious, and universally flattering, working beautifully with all skin tones. You can opt for a glossy finish for a sleek, classic look or a matte finish for something more modern and edgy."
Sophie agrees that the rise of brown designs has been inspired by the Rhode Skin founder. “The trend has really been amplified by Hailey Bieber’s iconic 'cinnamon-glazed' manicure, which has taken social media by storm," the nail expert says." Searches for 'chocolate glazed donut nails' have soared by 83.2 per cent on TikTok in the past week alone, signalling that these indulgent shades will continue to dominate as the go-to nail designs this festive season."
As we approach Christmas, this yummy trend shows no signs on slowing down. Sophie tells H! Fashion, “At Fresha, we’re anticipating a rise in bookings for chocolate and cinnamon-inspired manicures, with many clients adding festive twists like glitter accents, chrome finishes, or intricate nail art. With over 484,000 searches for ‘Christmas nails’ on TikTok in the past week, it’s clear that many are already seeking inspiration for their festive nail looks.”
How to achieve 'Chocolate Swirl' nails
Step 1: Prep
I opted for a long skinny almond shape for this mani-moment. However, if you're someone who prefers shorter nails you can still achieve this chic design. I went in for an infill, so my acrylic nails were refiled and shaped. Make sure that your nail artist also cleans up your cuticles with a soak, trim and a push back for a polished look.
Step 2: Base colour
For my base colour, I selected my go-to shade, Blazing Star's Ombre Powder in the colour Ash Rose (number 10). When you're selecting such an busy and intricate design, it's best to keep the base shade as natural as possible so the colours contrast rather than clash.
Step 3: Brown French Tip
Next, my nail artist used DND DC's nail polish is the deep chocolate shade, Walnut Brown. She created a french tip or smile line in a curve shaped on the tip of my nail and filled it in. After each nail was painted I put them under the LED UV lamp to dry.
Step 4: White swirl
For the white swirls, it was more of an intricate process. She poured some of the white polish (DND nail polish in the shade Snow Flake,) onto a palette. Then, she used a dotting pen tool to create the stunning swirls.
Step 5: Top coat
The top coat is important, not only keep the nails in place and dry, but also to give it that glossy glazed feel. After the nail set was completed, the top coat was added and I placed my hands under the LED UV lamp for five minutes.
Step 6: Oil the cuticles
This part can often be forgotten, but nail products can often be drying to your skin, so make sure your nail artist oils your cuticles at the end to strengthen the nails but also to give it a polished effect.
I've had this set now for a week and a half and I find that they go with most outfits during this winter season. I've also never had some many compliments on a mani-moment before. Chocolate swirl nails are so on-trend and chic for this time of year.

